How to Check App Store Subscriptions and Cancel Them
Learn how to check app store subscriptions on iPhone, Android and Mac, find charges you missed, and cancel before the next renewal.
14 min read
The charge lands on your statement every month from a name you half recognize. You open Settings, tap your name, open Subscriptions, and scroll. Nothing matches. You check the Play Store too, even though you're on an iPhone. Still nothing.
That gap stops most subscription hunts, and it isn't a glitch. A recurring charge can be billed by Apple, by Google, or by the developer directly through its own checkout page, and only the first two ever show up in a phone's subscription list. You can't cancel what you can't find, so the search starts with a question that comes before any menu path. Where is this thing billed?
Table of Contents
- Find Where Each Subscription Is Actually Billed
- How to Check Subscriptions on iPhone, iPad and Mac
- How to Check Subscriptions on Android and Google Play
- Record Each Subscription Before You Change Anything
- Spotting Missing, Duplicate and Unexpected Charges
- Cancel Before the Renewal Date and Confirm It Worked
Find Where Each Subscription Is Actually Billed
Read the descriptor on your bank or card statement before you touch a settings screen. APPLE.COM/BILL means Apple took the payment. GOOGLE *PLAY means Google did. A line carrying the app's own brand, a merchant identifier, or an unfamiliar city usually means the developer billed you through its own checkout page.
Google documents this blind spot directly. Subscriptions bought through alternative billing systems don't appear in Google Play's Subscription Center or on play.google.com, and users have to contact the app developer to manage or cancel them, according to Google Play's guidance on alternative billing. A live, recurring charge can sit outside every subscription screen on your phone. That is the point where people decide the charge is fraudulent or impossible to cancel. Both conclusions are usually wrong.
The two-question test: is the charge on your statement, and is it in either store's list? On the statement but absent from both lists means developer or web billing. Go to the receipt email first.
| Billing source | Where it appears | Where to manage it |
|---|---|---|
| Apple (iPhone or iPad) | Settings, Apple Account, Subscriptions | Same screen |
| Apple (Mac) | App Store, profile, Account Information, Subscriptions | Same screen |
| Apple-billed, used on Android | Not in Google Play | Apple Account website |
| Google Play (Android) | Google Play, Payments and subscriptions, Subscriptions | Same screen or play.google.com |
| Apple Music or Apple TV billed through Google Play | Google Play subscriptions | Google Play |
| Developer or web billing | Not in either store list | Contact the app developer or merchant |
Mixed households produce the strangest cases. An Apple-billed subscription can require management at the Apple Account website while the subscriber is holding an Android phone, and an Apple Music or Apple TV plan billed through Google Play gets cancelled in Google Play rather than on the Apple side. Someone who switched phones two years ago can still be paying through a store they no longer open.
Wellness and fitness apps sit in the riskiest group, because many of them sell annual plans on their own sites instead of through the stores. If you've been asking is Balance worth it during perimenopause, check the billing route before you subscribe, since that detail decides whether the plan will ever appear in Settings at all. The same test applies to any app advertising a discount for signing up on its website.
Write the billing source next to every charge as you find it. The cancel route follows the source, so a list that mixes store-billed and developer-billed items needs both paths. Guides to checking App Store subscriptions often skip this step and hand you a menu path that can't touch a developer-billed charge. When you want the wider inventory rather than one charge at a time, this walkthrough for finding all your subscriptions covers the account-by-account sweep.
How to Check Subscriptions on iPhone, iPad and Mac
Start in Settings, but remember the limit: this screen shows only subscriptions billed through your Apple Account. A charge with an Apple-looking receipt can still be absent if a different Apple Account, a Family Sharing member, or a non-store checkout owns it.
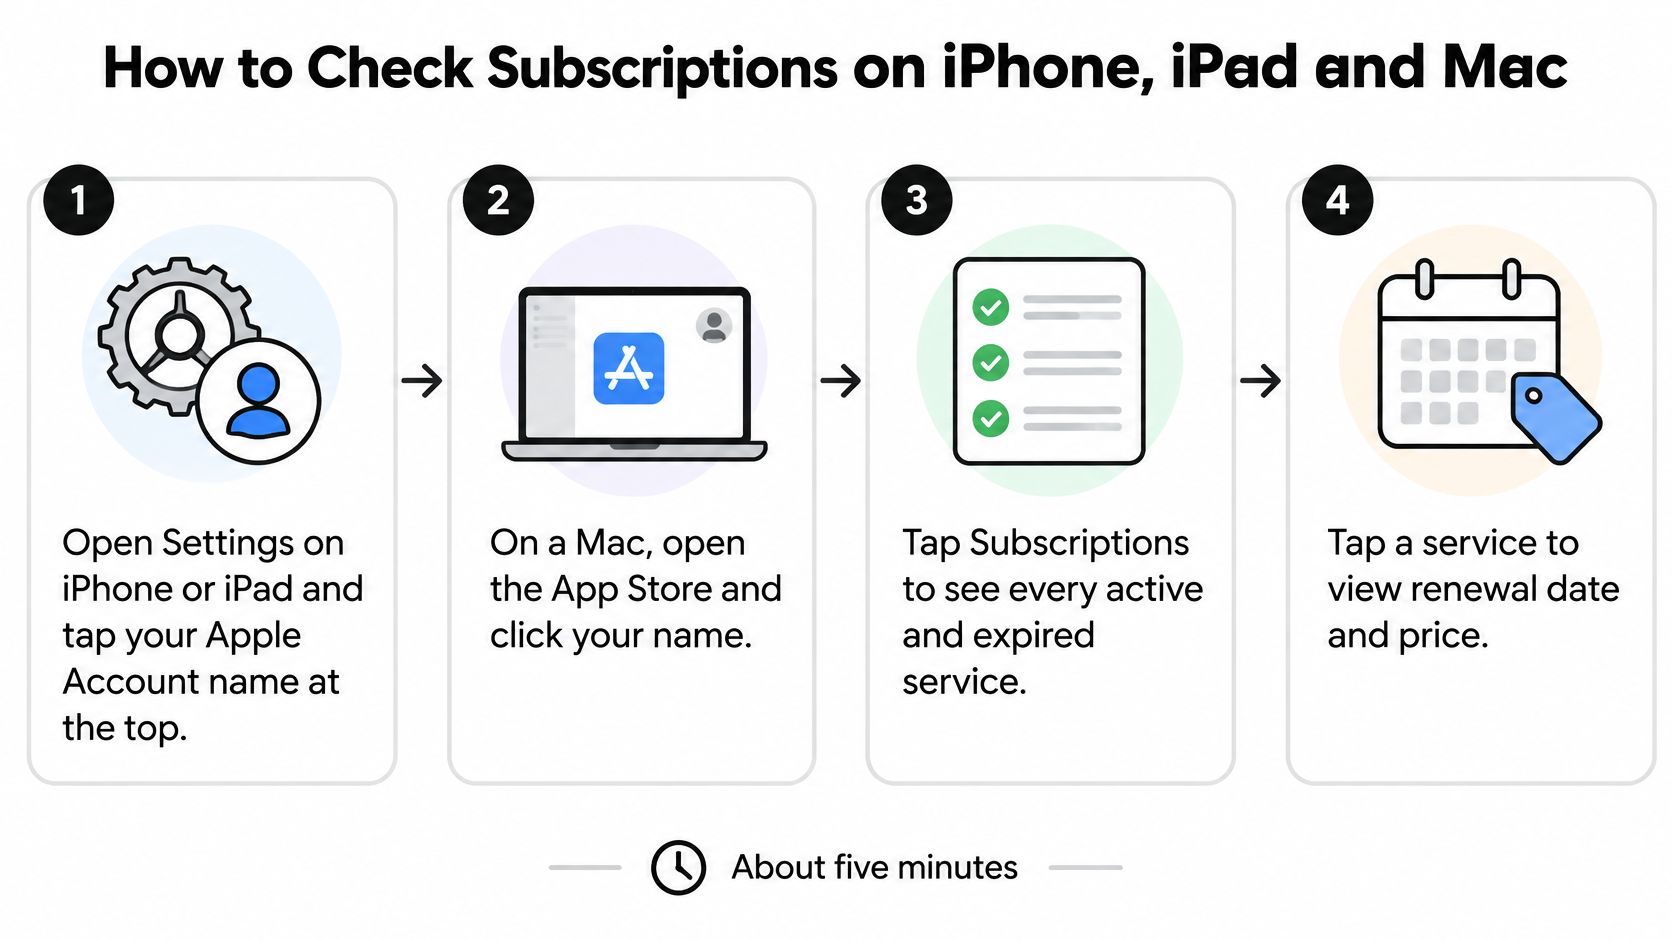
- Open the account screen. On iPhone or iPad, open Settings and tap your Apple Account name at the top. On a Mac, open the App Store, click your name in the sidebar, then open Account Information.
- Authenticate. Use Face ID, Touch ID, or your Apple Account password, depending on the device.
- Tap Subscriptions. Active plans, expired plans, and free trials sit in the same list, so read past the first group.
- Open every entry and read it. Note the plan name, renewal date, price, and billing interval before you change a setting.
- Turn off auto-renew to stop the next charge. For an iPhone-bought plan, Apple manages the billing and can charge a renewal up to 24 hours before the period ends, so cancel at least 24 hours before the renewal date. A trial on this list converts to paid on its date unless you act first.
Cancelled and expired are not the same thing
Turning off auto-renew does not end access. The paid period runs to its end, then the plan expires. Apple records the cancellation when the subscription reaches the end of its current period, not at the moment you flip the switch, so the status line can look unchanged for days after you acted.
Keep the two states apart in your notes. Cancelled means no further renewal. Expired means the paid time is gone and nothing more is owed. Confusing them sends people back to cancel a subscription that is already dead.
Record four details for every listing: the service name, the renewal date, the renewal price, and the payment account.
A healthy list looks boring. Every item is one you recognize, with a renewal date you can name and a price you expected to pay. If an entry is unfamiliar, check the Apple Account shown at the top of Settings before you cancel; the fix is often switching accounts, not disputing the charge.
How to Check Subscriptions on Android and Google Play
Ask who bills the charge before you search the list. A subscription missing from your phone's list is often billed by the developer or through a website rather than by Google, and most guides skip that check entirely. On Android the other common false alarm is the account itself: the plan sits under a different Google account than the one signed in, so it looks like nothing exists.
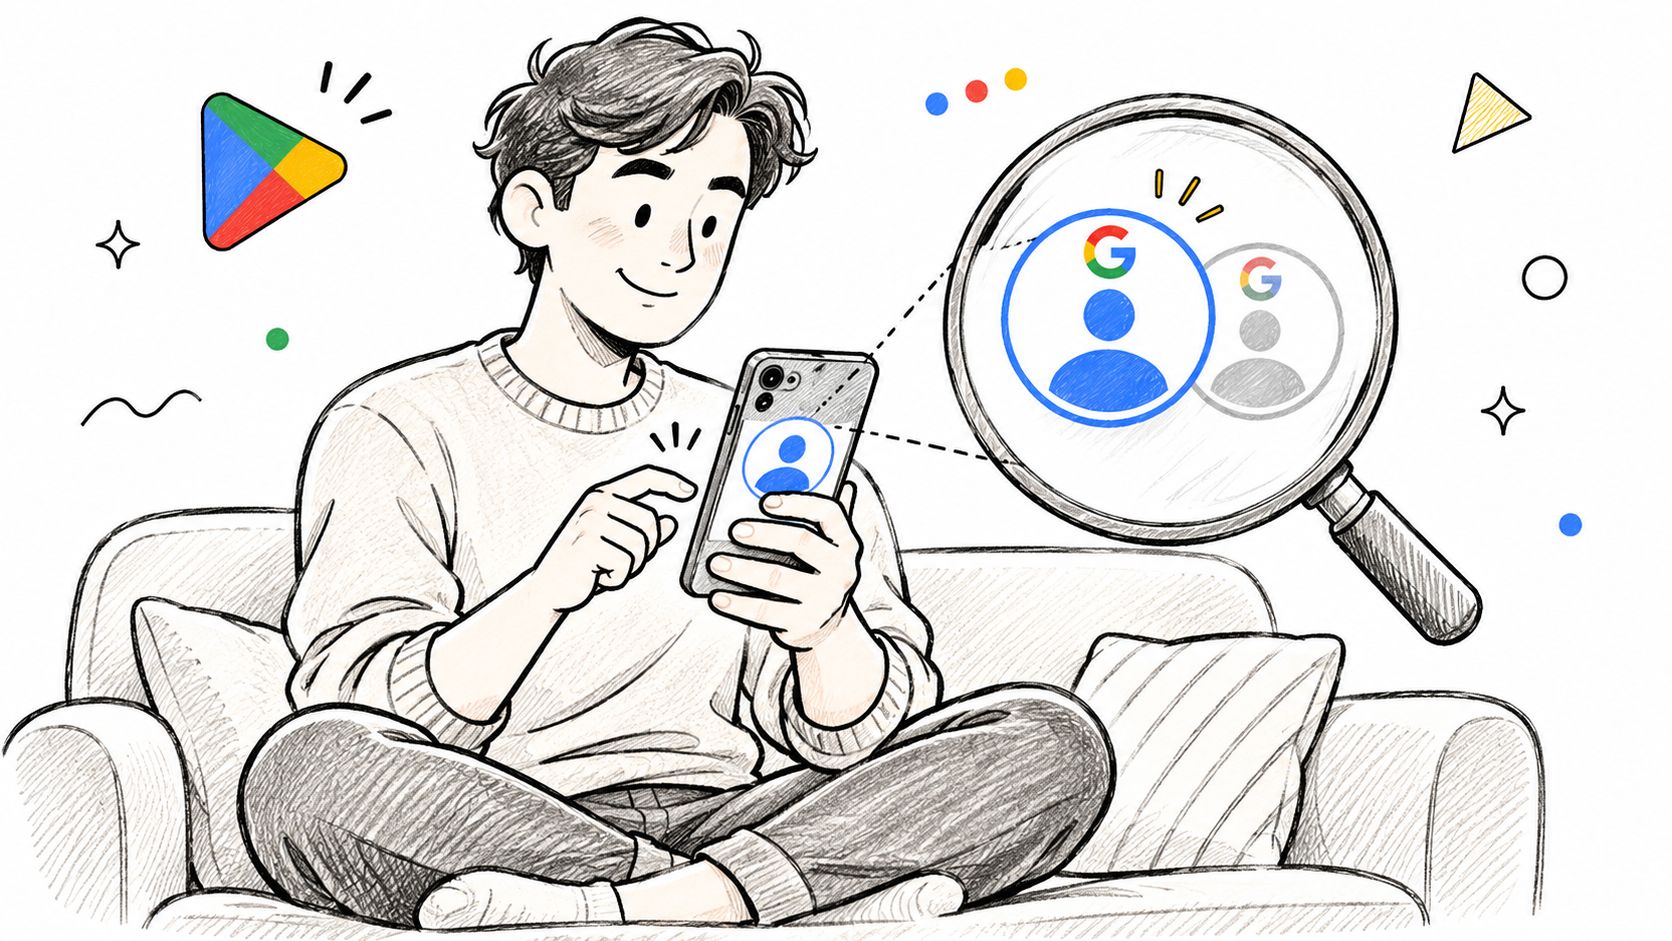
- Open Google Play and tap your profile icon in the top right corner.
- Choose Payments and subscriptions, then Subscriptions.
- Confirm the email shown at the top. If it isn't the account you used to buy, switch accounts and look again before deciding nothing is billed.
- Compare each renewal cadence and price with at least two recent transaction records. Taxes, introductory pricing, currency conversion, and price changes can all explain small differences. A gap you can't explain is a duplicate worth chasing.
- Open the plan and use Manage. Cancellation, pause, resubscription, and plan changes live there, per Google Play's cancellation and plan-change help. On a computer, open the Google Play subscriptions page and select Manage instead.
If the video below is easier to follow than text, it walks through the same screens.
Save the cancellation confirmation and check the account again after the next expected renewal date. A charge that still lands gets traced through the store's order history first, then to the merchant. Some cancelled plans may not restart directly, so if you might want the plan back, write down the plan name and the account before you cancel it.
Don't rely on the app's own settings for any of this. A subscription bought on Android is managed by Google Play, and the app may only display whether you currently have access. Changing a setting in the app can leave the billing untouched, and uninstalling the app does nothing to the subscription either.
Record Each Subscription Before You Change Anything
The moment you start cancelling is the worst moment to lose track of what you had. Build the record first: one row per service, five fields, about two minutes per item. Do it before any cancellations so a mistaken tap can be undone.
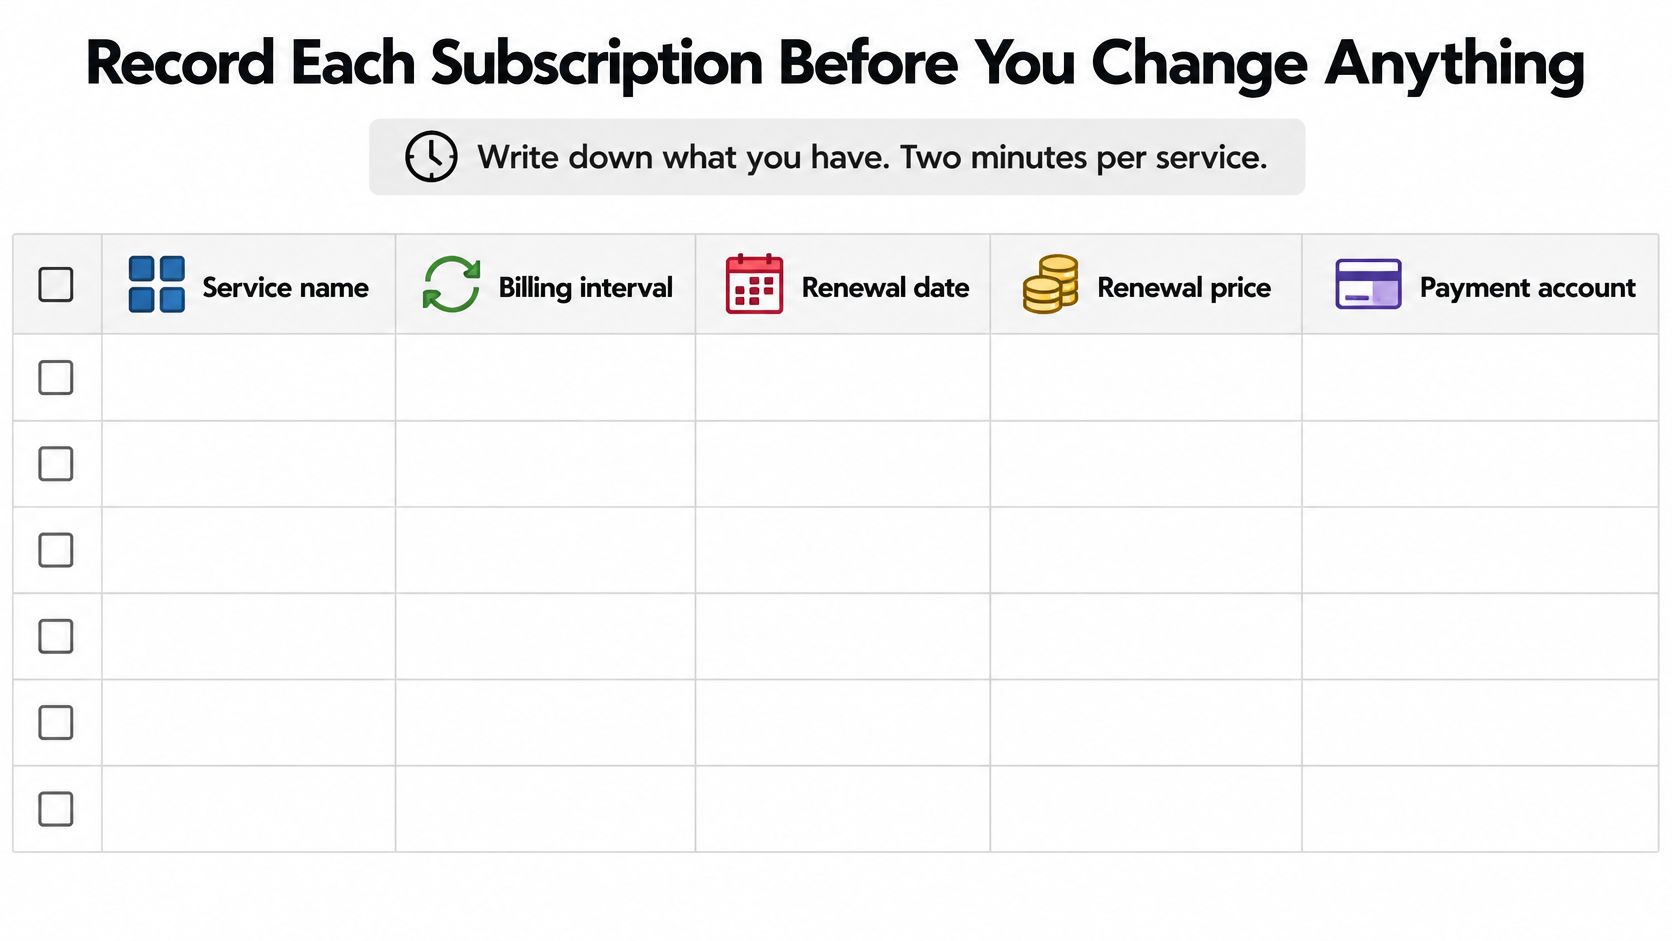
| Field | Where to find it | Why it matters |
|---|---|---|
| Service name | Subscriptions list in the store | Identifies the charge on your statement |
| Billing interval | Subscription detail screen | Separates monthly from yearly charges |
| Renewal date | Subscription detail screen | Sets your cancellation deadline |
| Renewal price | Subscription detail screen | Catches quiet price increases |
| Payment account | Store account and bank statement | Shows which card or account is charged |
Reconcile the record against the statement
Pull three months of bank and card transactions and search each merchant, app, and store name. Charges often carry a store descriptor rather than the brand you know, so searching "Netflix" can miss a line that reads like a payment processor. Look hardest for anything billed to an old card or to an account you stopped using.
Anything on the statement that neither store list explains goes back to the developer check, with the receipt email as the starting point. Two charges for the same service on different accounts, or a price that crept up after an introductory period, show up at this stage rather than in the store screens.
Practical rule: sort the finished sheet by renewal date, so the next deadline is always the top row.
Doing this by hand works, and it's worth doing once. Compass+ does the monitoring side differently: it connects to bank and card accounts, reads transaction history, and finds recurring charges and subscriptions, then puts each one on a recurring screen with its monthly cost. It's read-only, so it can find a charge and tell you the next step, but it can't cancel a merchant subscription for you. That last click stays with you.
Spotting Missing, Duplicate and Unexpected Charges
Most of the trouble traces back to one wrong assumption, and nearly everyone makes it: that removing the app removes the bill. Deleting the app doesn't cancel the subscription. The icon disappears, the renewal emails stop arriving in your face, and the charge keeps landing. Billing lives with the store account or the merchant, and the app was only ever a window into it.
| Symptom | Likely cause | Fix |
|---|---|---|
| Charge on statement, nothing in Apple or Google list | Developer or web billing | Find the receipt email and contact the developer |
| Subscription missing from the store | Different Apple or Google account signed in | Switch accounts and recheck the list |
| Charge after you cancelled | Renewal fell before your deadline, or you cancelled on another account | Check order history, then contact the merchant |
| Two charges for the same app | Duplicate subscription on two accounts or a shared purchase | Cancel the extra subscription |
| App deleted but still billed | Deleting the app does not cancel the subscription | Cancel in the store's subscription settings |
| Higher renewal price than expected | Price change you did not review | Compare with your record and cancel before the next renewal if unwanted |
What the delay actually costs
Waiting is expensive, and there's a number for it. A February 2024 filing from consumer advocates on the Federal Trade Commission's proposed amendments to its Negative Option Rule cited survey findings that more than half of respondents took an average of three months to cancel unwanted recurring payments, while 71% reported losing more than $600 per year on unwanted subscriptions, per the filing submitted to the FTC. Those are survey results rather than agency totals, but they price the habit of putting the check off. The volume explains why the problem persists: in 2024, subscriptions represented 48% of combined Apple App Store and Google Play app revenue, according to Appfigures data reported by Digital Information World.
Duplicates deserve their own look, because a second charge is easy to mistake for a billing error. When the same line appears twice, this breakdown of a duplicate charge on a bank statement separates a genuine double bill from a pending authorization that will drop off.
Renewal emails, refunds and the paper trail
If renewal notices are how you keep track and your inbox is where they go to die, a comparison of email unsubscribe apps for 2026 is worth twenty minutes, since a cleaner inbox makes the receipt search faster next time. For a charge you didn't intend, ask the platform that billed it for a refund before you call your bank. On the App Store, that request goes through reportaproblem.apple.com signed in with your Apple Account.
Cancel Before the Renewal Date and Confirm It Worked
This is the step that stops the next charge, and timing decides whether it works.
- Calendar each renewal date with a reminder two days before. A subscription bought on an iPhone is managed by Apple, and you should cancel at least 24 hours before the renewal date to avoid the next charge, because the store can bill a renewal up to 24 hours before the current period ends. A reminder on the renewal day itself is too late.
- Cancel inside the store's subscription settings. Removing the app leaves billing active.
- Confirm the status reads cancelled, with access continuing to the end of the period you already paid for.
- Save the proof. Screenshot the status screen or forward the confirmation email into the same folder as your record.
- Recheck the account after the next expected renewal date. A charge that still appears gets investigated through order history, then with the merchant.
One trap catches people who cancel correctly and still get billed. If you cancel a Compass+ plan, deleting your Compass+ account doesn't cancel the store subscription, so the store subscription has to be cancelled separately. The account and the billing are two different things, and that pattern holds across most apps that sell through Apple or Google.
Trials convert on their own clock and don't wait for a convenient moment. How to avoid free trial charges covers the timing so a free week doesn't become a paid year.
Work down your sheet from the soonest renewal date, and leave nothing you no longer use sitting there because the amount felt small. The best moment to catch a renewal is the week before it bills, when cancelling costs you nothing but a few taps. Then take the one subscription you haven't opened in a month and cancel it today.
Compass+ watches the charges you've already stopped thinking about, connecting to bank and card accounts so recurring bills, duplicate charges, and price increases surface on their own instead of waiting for you to notice. Pair that with the store checks above and you get both halves of the job: the app finds what's out there, and you make the cancellation call. Start with the free private audit at Compass+ to see what's worth investigating first.